
Hello Readers! Intune standalone allows greater Win32 app management capabilities. While it is possible for cloud connected customers to use Configuration Manager for Win32 app management, Intune-only customers will have greater management capabilities for their Win32 line-of-business (LOB) apps. In this post we will show you how to install Team viewer application on Windows 10 managed devices. On the next post we will integrate Intune with Team Viewer so you can remotely support your users that are currently working from home but this is a good start.
Requirements:
- Windows 10 version 1607 or later
- Windows 10 device must be managed by Intune
- Team Viewer setup file. You can download it here.
Prepare the win32 app content
- Download the Team Viewer set up file and save it locally. For this example, we created the folder: C:\Cloudelly\Source
- Download the Microsoft Intune Win32 App Upload Prep Tool and extract it to C:\IntuneAppTool. You can download it here.
- Create the output folder for the .intunewin package. For this example, we created the folder: C:\Cloudelly\Output
- Run cmd as admin and move to the directory where IntuneWinAppUtil was extracted to.
- Run the utility using the directories accordingly.
.\IntuneWinAppUtil.exePlease specify the source folder: C:\Cloudelly\SourcePlease specify the setup file: TeamViewer_Setup.execode>Please specify the output folder: TeamViewer_Setup.exe
Do you want to specify catalog folder (Y/N)?N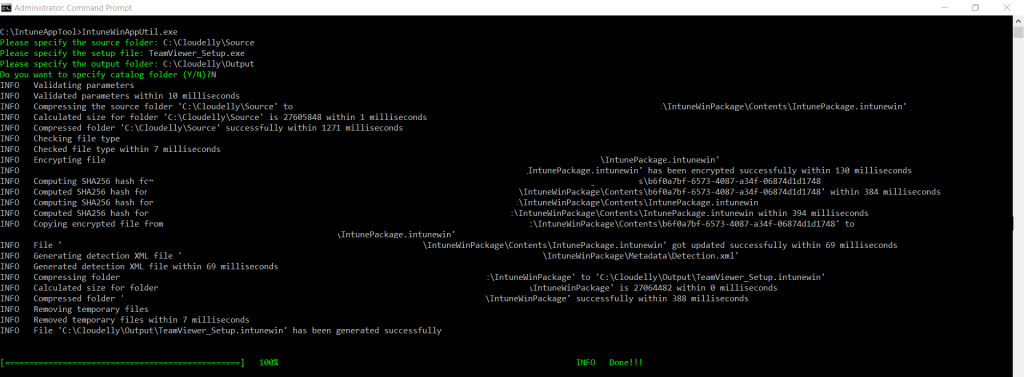
- Verify that the package was created succesfully on the directory.

Deploy WIN32 app on Endpoint Manager
- Sign into the Microsoft Endpoint Manager admin center.
- Select Apps > All apps > Add.
- In the Select app type pane, under the Other app types, select Windows app (Win32).
- Click Select.

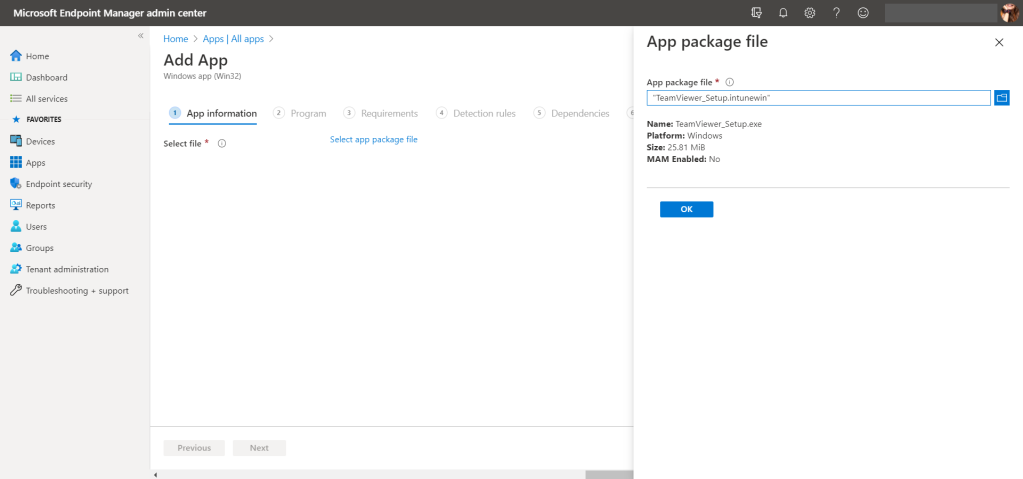
- Click on Select app package file
- Browse to the .intunewin file. For this example the file is located on: C:\Cloudelly\Output
- Click OK
4. Add app information such as Name, Description and Publisher.

5. Enter the install and uninstall command. For this example, we used:
TeamViewer_Setup.exe /SC:\Program Files (x86)\TeamViewer\uninstall.exe /S
6. For the operating system architecture you can choose both 32-bit and 64-bit. The minimum OS version is Windows 10 1607. You can configure these settings according to your needs.

7. Choose Manually configure detection rules and add the information as below:
Path: C:\Program Files (x86)\TeamViewer File or folder: TeamViewer.exe
8. For this app we do not have dependencies, click Next

9. Select the test group and click on Review + save.
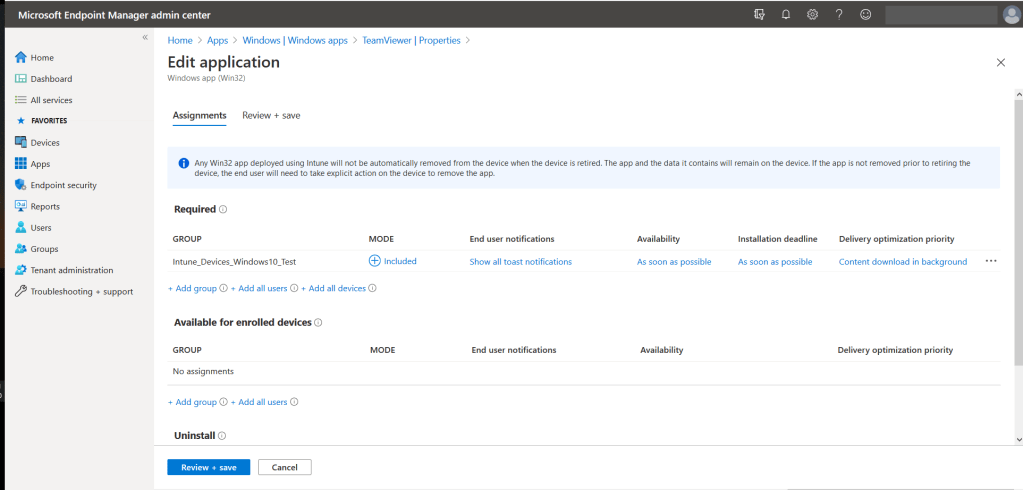
10. Review your configuration and click on Create.

The Team Viewer application will be uploaded and deployed to the targeted group.
You can monitor the process on Apps > App install Status > Team Viewer

Follow the guide and test it on your end and don’t forget to post your questions or comments.
References
Microsoft docs: Win32 App Management

Great article – thank you! What do you do when the teamviewer app needs to be updated? According to teamviewer support, it will not autoupdate so you have to redeploy the host. Have you done this by chance? The latest version is 15.21.6.
LikeLike
Hi David, Thank you for your comment. You need to update your package and make the deployment for the group again. How did you resolve it?
LikeLike
Hi,
Great post but unfortunately I keep getting this error.
Error code: 0x80070002
The system cannot find the file specified
Cheers,
F
LikeLike
It’s working now, the problem was that the file name you specified under section 5 TeamViewer_Setup.exe /S
Should actually be TeamViewer_Setup_x64.exe /S
At least for my executable anyway, then it installed OK.
Perhaps the file name had changed when downloading TeamViewer between your blog and this comment.
Cheers,
F
LikeLike
what would be the detection rule for TeamViewer Quick Support and also the uninstall command
LikeLike